
2022年11月10日リリースされた「macOS(13.0.1)Ventura」で以前の記事「macOS(12.0.1)MontereyでMAMP」で紹介したHomeBrewで作成したMAMP環境がまともに動いていたのですが、HomeBrewをアップデートしたら、ローカルホストに接続できなくなってしまいました。Xcodeコマンドラインツールを再インストールしたり、PHP7.4を再インストールしたり、HTTPDを再インストールしたりと色々修復を試みたのですが、一つエラーを修復すると新しいエラーが発生し、私には手に負えない状況となってしまいました。あれこれ悩むより一からやり直そうと、思い切ってHomeBrewを再インストールして、一からMAMP環境を作り直しました。そのログを備忘録として以下に記載いたします。
[標準]Apacheの起動、再起動、停止、自動起動
iMac(Ventura)のターミナルにコマンド入力して、標準でインストールされているApache(以下、[標準]Apache)の「停止」と「自動起動の解除」を行いました。
- 以下のコマンドで[標準]Apacheが起動します。
% sudo apachectl start
- 以下のコマンドで[標準]Apacheが停止します。
% sudo apachectl stop
- 以下のコマンドで[標準]Apacheが再起動します。
% sudo apachectl restart
- 以下のコマンドでApacheの起動状態を確認できます。
% ps agx | grep httpd
 1619 s000  S+     0:00.00 grep httpd
% ↑ Apacheが起動していない
% ps agx | grep httpd
2361   ??  Ss     0:00.00 /usr/local/opt/httpd/bin/httpd -k start
2362   ??  S      0:00.00 /usr/local/opt/httpd/bin/httpd -k start
2363   ??  S      0:00.00 /usr/local/opt/httpd/bin/httpd -k start
2364   ??  S      0:00.00 /usr/local/opt/httpd/bin/httpd -k start
2365   ??  S      0:00.00 /usr/local/opt/httpd/bin/httpd -k start
2366   ??  S      0:00.00 /usr/local/opt/httpd/bin/httpd -k start
2368 s000  R+     0:00.00 grep httpd
% ↑ Apacheが起動している
- 以下のコマンドで[標準]Apacheの自動起動を解除できます。
% sudo launchctl unload -w /System/Library/LaunchDaemons/org.apache.httpd.plist
- 以下のコマンドで[標準]Apacheの自動起動を設定できます。
% sudo launchctl load -w /System/Library/LaunchDaemons/org.apache.httpd.plist
HomeBrewの再インストール
iMac(Ventura)にインストールされている[標準]Apacheの「停止」と「自動起動の解除」を行なった後、HomeBrewの再インストールを行いました。
- 以下のコマンドでHomeBrewをアンインストールしました。(参考 URL -> Uninstall Homebrew)
% /bin/bash -c "$(curl -fsSL https://raw.githubusercontent.com/Homebrew/install/HEAD/uninstall.sh)"
:
Are you sure you want to uninstall Homebrew? This will remove your installed packages! [y/N] y
:
==> Removing empty directories...
Password:
:
==> Homebrew uninstalled!
The following possible Homebrew files were not deleted:
/usr/local/.com.apple.installer.keep
/usr/local/Cellar/
/usr/local/Frameworks/
/usr/local/Homebrew/
/usr/local/bin/
/usr/local/etc/
/usr/local/include/
/usr/local/lib/
/usr/local/opt/
/usr/local/sbin/
/usr/local/share/
/usr/local/var/
You may wish to remove them yourself.
- 削除されなかったファイルを手動で削除しました。
% sudo rm -rf /usr/local/.com.apple.installer.keep
% sudo rm -rf /usr/local/Cellar/
% sudo rm -rf /usr/local/Frameworks/
% sudo rm -rf /usr/local/Homebrew/
% sudo rm -rf /usr/local/bin/
% sudo rm -rf /usr/local/etc/
% sudo rm -rf /usr/local/include/
% sudo rm -rf /usr/local/lib/
% sudo rm -rf /usr/local/opt/
% sudo rm -rf /usr/local/sbin/
% sudo rm -rf /usr/local/share/
% sudo rm -rf /usr/local/var/
- 以下のコマンドでHomeBrewを再インストールしました。(参考 URL -> Install Homebrew (on macOS or Linux))
% /bin/bash -c "$(curl -fsSL https://raw.githubusercontent.com/Homebrew/install/HEAD/install.sh)" : ==> Checking for `sudo` access (which may request your password)... ==> This script will install: /usr/local/bin/brew /usr/local/share/doc/homebrew /usr/local/share/man/man1/brew.1 /usr/local/share/zsh/site-functions/_brew /usr/local/etc/bash_completion.d/brew /usr/local/Homebrew ==> The following new directories will be created: /usr/local/bin /usr/local/etc /usr/local/include /usr/local/lib /usr/local/sbin /usr/local/share /usr/local/var /usr/local/opt /usr/local/share/zsh /usr/local/share/zsh/site-functions /usr/local/var/homebrew /usr/local/var/homebrew/linked /usr/local/Cellar /usr/local/Caskroom /usr/local/Frameworks Press RETURN/ENTER to continue or any other key to abort: : ==> Installation successful! : ==> Next steps: - Run brew help to get started - Further documentation: https://docs.brew.sh - 以下のコマンドでインストール結果を確認しました。
% brew doctor
Your system is ready to brew.
- 念のために、以下のコマンドでアップデートしました。
% brew update
Already up-to-date.
- 以下のコマンドでバージョンを確認しました。
% brew -v
Homebrew 3.6.14
[HomeBrew]Apacheのインストール
HomeBrewでApacheをインストールしてインストールされた[HomeBrew]Apacheのバージョンを確認しました。
- 以下のコマンドで[HomeBrew]Apacheをインストールしました。
% brew install httpd
:
==> Caveats
DocumentRoot is /usr/local/var/www.

The default ports have been set in /usr/local/etc/httpd/httpd.conf to 8080 and in
/usr/local/etc/httpd/extra/httpd-ssl.conf to 8443 so that httpd can run without sudo.

To restart httpd after an upgrade:
  brew services restart httpd
Or, if you don't want/need a background service you can just run:
 /usr/local/opt/httpd/bin/httpd -D FOREGROUND
==> Summary
 /usr/local/Cellar/httpd/2.4.54_1: 1,662 files, 31.5MB
==> Running `brew cleanup httpd`...
Disable this behaviour by setting HOMEBREW_NO_INSTALL_CLEANUP.
Hide these hints with HOMEBREW_NO_ENV_HINTS (see `man brew`).
==> Caveats
==> httpd
DocumentRoot is /usr/local/var/www.

The default ports have been set in /usr/local/etc/httpd/httpd.conf to 8080 and in
/usr/local/etc/httpd/extra/httpd-ssl.conf to 8443 so that httpd can run without sudo.

To restart httpd after an upgrade:
  brew services restart httpd
Or, if you don't want/need a background service you can just run:
  /usr/local/opt/httpd/bin/httpd -D FOREGROUND
- 以下のコマンドで[HomeBrew]Apacheのバージョンを確認しました。
% httpd -v
Server version: Apache/2.4.54 (Unix)
[HomeBrew]Apacheの起動(自動起動)、再起動と停止
[HomeBrew]Apacheの動作を確認をしました。
- 以下のコマンドで、[HomeBrew]Apacheを起動します。一度起動すると、自動起動に設定されるようです。
% brew services start httpd
:
==> Successfully started `httpd` (label: homebrew.mxcl.httpd)
- 以下のコマンドで、[HomeBrew]Apacheを停止します。
% brew services stop httpd
Stopping `httpd`... (might take a while)
==> Successfully stopped `httpd` (label: homebrew.mxcl.httpd)
- 以下のコマンドで、[HomeBrew]Apacheを再起動します。
% brew services restart httpd
Stopping `httpd`... (might take a while)
==> Successfully stopped `httpd` (label: homebrew.mxcl.httpd)
==> Successfully started `httpd` (label: homebrew.mxcl.httpd)
- [HomeBrew]Apache動作確認用の最低限の設定として、エディタ(nano)で「httpd.conf」(/usr/local/etc/httpd/httpd.conf)を以下のように修正しました。
% sudo nano /usr/local/etc/httpd/httpd.conf
- 「Listen 8080」を「Listen 80」に変更しました。
#-# Listen 8080
Listen 80
- ServerNameを「localhost」に変更しました。
#-# ServerName www.example.com:8080
ServerName localhost
- 「Listen 8080」を「Listen 80」に変更しました。
- DocumentRoot(“/usr/local/var/www”)フォルダの「User/Group」をhttpd.confの設定(_www:_www)に合わせて変更しました。
% sudo chown -R _www:_www /usr/local/var/www
% cd /usr/local/var/
% ls -la
drwxr-xr-x   4 _www     _www   .... www
- エディタ(nano)で「index.html」(以下に記載)を作成して、上記のDocumentRoot(“/usr/local/var/www”)フォルダに保存しました。
% sudo nano /usr/local/var/www/index.html
% cd /usr/local/var/www/
% ls -la
-rw-r--r--  1 _www     _www    .... index.html
- 「index.html」↓
<html>
<body>
<h1>LocalSites works!</h1>
</body>
</html>
- 「index.html」↓
- Apacheを再起動してブラウザでlocalhostにアクセスし、DocumentRoot(”/usr/local/var/www”)のindex.html(「It works!」)が正しく表示される事を確認しました。
% brew services restart httpd
Stopping `httpd`... (might take a while)
==> Successfully stopped `httpd` (label: homebrew.mxcl.httpd)
==> Successfully started `httpd` (label: homebrew.mxcl.httpd)
[HomeBrew]ApacheのDocumentRoot変更
「httpd.conf」のDocumentRootを/Users/{username}/LocalSites/に変更しました。({username}は、対象環境のユーザーネームに置き換えてください。)
- ターミナルからエディタ(nano)で[HomeBrew]Apacheの「httpd.conf」を修正しました。
% sudo nano /usr/local/etc/httpd/httpd.conf
- rewriteを使用することができるようにするために、以下の記述をコメントアウトしてモジュールを組み込みました。
LoadModule rewrite_module lib/httpd/modules/mod_rewrite.so
- DocumentRootを/Users/{username}/LocalSites/に変更し、AllowOverrideの設定をNoneからAllに変更しました。
#-# DocumentRoot "/usr/local/var/www" #-# <Directory "/usr/local/var/www"> DocumentRoot "/Users/{username}/LocalSites/" <Directory "/Users/{username}/LocalSites/"> #-# AllowOverride None AllowOverride All - iMacのFinderを使用して、ユーザーフォルダ以下に”LocalSites”という名前でフォルダ(/Users/{username}/LocalSites/)を作成ました。
% cd /Users/{username}/ % ls -la drwxr-xr-x 2 {username} staff .... LocalSites - iMacで使用しているエディタ(Atom)でindex.html(以下に記載)を作成して、上記”LocalSites”フォルダに保存しました。
<html>
<body>
<h1>LocalSites works!</h1>
</body>
</html>
- Apacheを再起動してブラウザでlocalhostにアクセスし、DocumentRoot(”/Users/{username}/LocalSites/”)のindex.html(「LocalSites works!」)が正しく表示される事を確認しました。
% brew services restart httpd
Stopping `httpd`... (might take a while)
==> Successfully stopped `httpd` (label: homebrew.mxcl.httpd)
==> Successfully started `httpd` (label: homebrew.mxcl.httpd)
[HomeBrew]PHPのインストール
HomeBrewでPHPをインストールしてインストールされた[HomeBrew]PHPのバージョンを確認しました。
- HomeBrewでインストールできるPHPのバージョンを確認しました。
% brew search php
==> Formulae
brew-php-switcher          php-cs-fixer@2             phpbrew                    phpstan
php                        php@7.4                    phplint                    phpunit
php-code-sniffer           php@8.0                   phpmd                      pcp
php-cs-fixer               php@8.1 ✔                  phpmyadmin                 pup
- 「php@7.4」と「php@8.0」「php@8.1」がインストールできるようなので、以下のコマンドで「php@8.1」をインストールしました。
% brew install php@8.1 : => Caveats To enable PHP in Apache add the following to httpd.conf and restart Apache: LoadModule php_module /usr/local/opt/php@8.1/lib/httpd/modules/libphp.so <FilesMatch \.php$> SetHandler application/x-httpd-php </FilesMatch> Finally, check DirectoryIndex includes index.php DirectoryIndex index.php index.html The php.ini and php-fpm.ini file can be found in: /usr/local/etc/php/8.1/ php@8.1 is keg-only, which means it was not symlinked into /usr/local, because this is an alternate version of another formula. If you need to have php@8.1 first in your PATH, run: echo 'export PATH="/usr/local/opt/php@8.1/bin:$PATH"' >> ~/.zshrc echo 'export PATH="/usr/local/opt/php@8.1/sbin:$PATH"' >> ~/.zshrc For compilers to find php@8.1 you may need to set: export LDFLAGS="-L/usr/local/opt/php@8.1/lib" export CPPFLAGS="-I/usr/local/opt/php@8.1/include" To restart php@8.1 after an upgrade: brew services restart php@8.1 Or, if you don't want/need a background service you can just run: /usr/local/opt/php@8.1/sbin/php-fpm --nodaemonize ==> Summary /usr/local/Cellar/php@8.1/8.1.13: 513 files, 80.0MB ==> Running `brew cleanup php@8.1`... Disable this behaviour by setting HOMEBREW_NO_INSTALL_CLEANUP. Hide these hints with HOMEBREW_NO_ENV_HINTS (see `man brew`). - 以下のコマンドで、php@8.1のPATHを「~/.zshrc」に設定して反映させました。
% cd ~
% echo 'export PATH="/usr/local/opt/php@8.1/bin:$PATH"' >> ~/.zshrc
% echo 'export PATH="/usr/local/opt/php@8.1/sbin:$PATH"' >> ~/.zshrc
% source ~/.zshrc
% php -v
PHP 8.1.13 (cli) (built: Dec  9 2022 16:23:19) (NTS)
- 「.zshrc」の中身↓
export PATH="/usr/local/opt/php@8.1/bin:$PATH"
export PATH="/usr/local/opt/php@8.1/sbin:$PATH"
- 「.zshrc」の中身↓
[HomeBrew]ApacheとPHPの連携設定
HomeBrewにインストーリしたApache(2.4)とPHP(8.1)の連携設定をしました。
- エディタ(nano)で「httpd.conf」(/usr/local/etc/httpd/httpd.conf)を以下のように修正しました。
% sudo nano /usr/local/etc/httpd/httpd.conf
- LoadModuleの最後に以下の内容を追加しました。
LoadModule php_module /usr/local/opt/php@8.1/lib/httpd/modules/libphp.so <FilesMatch \.php$> SetHandler application/x-httpd-php </FilesMatch> - DirectoryIndexに「index.php」を追加しました。
<IfModule dir_module> DirectoryIndex index.php index.html </IfModule> - iMacで使用しているエディタ(Atom)でphpinfo.php(以下に記載)を作成して、上記”LocalSites”フォルダに保存しました。
- 「phpinfo.php」↓
<?php
phpinfo();
?>
- 「phpinfo.php」↓
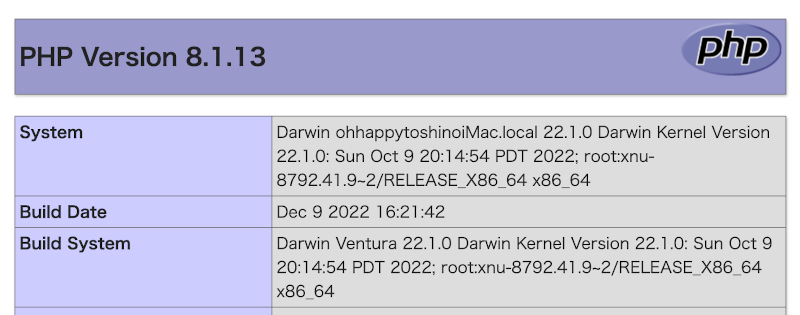
- Apacheを再起動してブラウザで「localhost/phpinfo.php」にアクセスし正しく表示される事を確認しました。
% brew services restart httpd
Stopping `httpd`... (might take a while)
==> Successfully stopped `httpd` (label: homebrew.mxcl.httpd)
==> Successfully started `httpd` (label: homebrew.mxcl.httpd)
「phpinfo.php」↓

- php.ini(/usr/local/etc/php/8.1/php.ini)の編集を行いました。
% php -i | grep "Loaded Configuration File"
Loaded Configuration File => /usr/local/etc/php/8.1/php.ini
% sudo nano /usr/local/etc/php/8.1/php.ini
- タイムゾーンに’Asia/Tokyo’を設定
date.timezone = 'Asia/Tokyo'
- post_max_sizeを「8M」から「512M」に変更しました
post_max_size = 512M
- upload_max_filesizeを「2M」から「512M」に変更しました
upload_max_filesize = 512M
- extensionの設定(コメントアウト)を行いました。
extension=mbstring
extension=mysqli
- mbstringの日本語設定を行いました。
mbstring.language = Japanese
mbstring.internal_encoding = 'UTF-8'
- 非推奨(”Deprecated”)警告を回避するため『 ~E_DEPRECATED 』をエラーレベルに追加しました。
error_reporting = E_ALL & ~E_NOTICE & ~E_DEPRECATED
- タイムゾーンに’Asia/Tokyo’を設定
- PukiWiki1.5.4(PHP8.1対応)とDokuWiki(“Igor”)を新しくインストールして、問題なく動作する事を確認しました。
[HomeBrew]MySQLのインストール
HomeBrewでMySQLをインストールしてインストールされた[HomeBrew]MySQLのバージョンを確認しました。
- HomeBrewでインストールできるMySQLのバージョンを確認しました。
% brew search mysql
==> Formulae
automysqlbackup            mysql-client               mysql-sandbox              mysql@5.7
mysql                      mysql-client@5.7           mysql-search-replace       mysqltuner
mysql++                    mysql-connector-c++        mysql@5.6
- 「mysql@5.6」と「mysql@5.7」がインストールできるようなので、以下のコマンドで「mysql@5.7」をインストールしました。
% brew install mysql@5.7 : ==> Caveats ==> mysql@5.7 We've installed your MySQL database without a root password. To secure it run: mysql_secure_installation MySQL is configured to only allow connections from localhost by default To connect run: mysql -uroot A "/etc/my.cnf" from another install may interfere with a Homebrew-built server starting up correctly. mysql@5.7 is keg-only, which means it was not symlinked into /usr/local, because this is an alternate version of another formula. If you need to have mysql@5.7 first in your PATH, run: echo 'export PATH="/usr/local/opt/mysql@5.7/bin:$PATH"' >> ~/.zshrc For compilers to find mysql@5.7 you may need to set: export LDFLAGS="-L/usr/local/opt/mysql@5.7/lib" export CPPFLAGS="-I/usr/local/opt/mysql@5.7/include" To restart mysql@5.7 after an upgrade: brew services restart mysql@5.7 Or, if you don't want/need a background service you can just run: /usr/local/opt/mysql@5.7/bin/mysqld_safe --datadir=/usr/local/var/mysql - 以下のコマンドで、mysql@5.7のPATHを「~/.zshrc」に設定して反映させました。
% cd ~
% echo 'export PATH="/usr/local/opt/mysql@5.7/bin:$PATH"' >> ~/.zshrc
% source ~/.zshrc
% mysql --version
mysql  Ver 14.14 Distrib 5.7.40, for osx10.18 (x86_64) using  EditLine wrapper
% brew services restart mysql@5.7
Stopping `mysql@5.7`... (might take a while)
==> Successfully stopped `mysql@5.7` (label: homebrew.mxcl.mysql@5.7)
==> Successfully started `mysql@5.7` (label: homebrew.mxcl.mysql@5.7)
- 「.zshrc」の中身↓
export PATH="/usr/local/opt/php@8.1/bin:$PATH"
export PATH="/usr/local/opt/php@8.1/sbin:$PATH"
export PATH="/usr/local/opt/mysql@5.7/bin:$PATH"
- 「.zshrc」の中身↓
- 以下のコマンドで、mysql@5.7の初期設定(セキュリティの設定)を行いました。
% mysql_secure_installation : Connecting to MySQL using a blank password. : Would you like to setup VALIDATE PASSWORD plugin? Press y|Y for Yes, any other key for No: y : LOW Length >= 8 MEDIUM Length >= 8, numeric, mixed case, and special characters STRONG Length >= 8, numeric, mixed case, special characters and dictionary file Please enter 0 = LOW, 1 = MEDIUM and 2 = STRONG:0 Please set the password for root here. New password: {ROOTPATHWORD}を入力 Re-enter new password: {ROOTPATHWORD}を入力 : Do you wish to continue with the password provided?(Press y|Y for Yes, any other key for No) : y : Remove anonymous users? (Press y|Y for Yes, any other key for No) : y : Disallow root login remotely? (Press y|Y for Yes, any other key for No) : y : Remove test database and access to it? (Press y|Y for Yes, any other key for No) : y : Reload privilege tables now? (Press y|Y for Yes, any other key for No) : y Success. : All done! - 設定した{ROOTPATHWORD}でmysqlにrootでログインできる事を確認しました。
% mysql -uroot -p{ROOTPATHWORD}
mysql: [Warning] Using a password on the command line interface can be insecure.
Welcome to the MySQL monitor.  Commands end with ; or \g.
Your MySQL connection id is 5
Server version: 5.7.40 Homebrew

Copyright (c) 2000, 2022, Oracle and/or its affiliates.

Oracle is a registered trademark of Oracle Corporation and/or its
affiliates. Other names may be trademarks of their respective
owners.

Type 'help;' or '\h' for help. Type '\c' to clear the current input statement.

mysql> quit
Bye
%
[HomeBrew]MySqlの起動(自動起動)、再起動と停止
- 以下のコマンドで、[HomeBrew]MySqlを起動します。一度起動すると、自動起動に設定されるようです。
% brew services start mysql@5.7
==> Successfully started `mysql@5.7` (label: homebrew.mxcl.mysql@5.7)
- 以下のコマンドで、[HomeBrew]MySqlを停止します。
% brew services stop mysql@5.7
Stopping `mysql@5.7`... (might take a while)
==> Successfully stopped `mysql@5.7` (label: homebrew.mxcl.mysql@5.7)
- 以下のコマンドで、[HomeBrew]MySqlを再起動します。
% brew services restart mysql@5.7
==> Successfully stopped `mysql@5.7` (label: homebrew.mxcl.mysql@5.7)
==> Successfully started `mysql@5.7` (label: homebrew.mxcl.mysql@5.7)
[HomeBrew]phpMyAdminのインストール
HomeBrewでphpMyAdminをインストールしました。
- 以下のコマンドで「phpMyAdmin」をインストールしました。
% brew install phpmyadmin : ==> Caveats To enable phpMyAdmin in Apache, add the following to httpd.conf and restart Apache: Alias /phpmyadmin /usr/local/share/phpmyadmin <Directory /usr/local/share/phpmyadmin/> Options Indexes FollowSymLinks MultiViews AllowOverride All <IfModule mod_authz_core.c> Require all granted </IfModule> <IfModule !mod_authz_core.c> Order allow,deny Allow from all </IfModule> </Directory> Then open http://localhost/phpmyadmin The configuration file is /usr/local/etc/phpmyadmin.config.inc.php ==> Summary /usr/local/Cellar/phpmyadmin/5.2.0: 3,553 files, 44.7MB ==> Running `brew cleanup phpmyadmin`... Disable this behaviour by setting HOMEBREW_NO_INSTALL_CLEANUP. Hide these hints with HOMEBREW_NO_ENV_HINTS (see `man brew`). - エディタ(nano)で「httpd.conf」(/usr/local/etc/httpd/httpd.conf)の最後尾に以下の設定を追加しました。
% sudo nano /usr/local/etc/httpd/httpd.conf
- 「httpd.conf」に追記した内容↓
Alias /phpmyadmin /usr/local/share/phpmyadmin
<Directory /usr/local/share/phpmyadmin/>
    Options Indexes FollowSymLinks MultiViews
    AllowOverride All
    <IfModule mod_authz_core.c>
        Require all granted
    </IfModule>
    <IfModule !mod_authz_core.c>
        Order allow,deny
        Allow from all
    </IfModule>
</Directory>
- 「httpd.conf」に追記した内容↓
- Apacheを再起動してブラウザで「localhost/phpmyadmin/
」にアクセスしMySQLインストール時に設定した「ユーザ名(root)」と「パスワード{ROOTPATHWORD}}」で管理画面にログインできることを確認しました。% brew services restart httpd Stopping `httpd`... (might take a while) ==> Successfully stopped `httpd` (label: homebrew.mxcl.httpd) ==> Successfully started `httpd` (label: homebrew.mxcl.httpd)
「phpinfo.php」↓
- 管理画面下部に「phpMyAdmin 環境保管領域が完全に設定されていないため、いくつかの拡張機能が無効になっています。」と表示されたので、「理由についてはこちらをご覧ください。」リンクの指示に従い環境保管領域を設定しました。
- 管理画面下部に「設定ファイルに、暗号化 (blowfish_secret) 用の非公開パスフレーズの設定を必要とするようになりました。」と表示されていたので、configuration file(/usr/local/etc/phpmyadmin.config.inc.php)に公開パスフレーズの設定を行いました。
% sudo nano /usr/local/etc/phpmyadmin.config.inc.php
- 公開パスフレーズの設定↓
/**
 * This is needed for cookie based authentication to encrypt password in
 * cookie. Needs to be 32 chars long.
 */
$cfg['blowfish_secret'] = '{32バイトの文字を設定する}'; /* YOU MUST FILL IN THIS FOR COOKIE AUTH! */
- 公開パスフレーズの設定↓
- Apacheを再起動してブラウザでphpMyAdminの管理画面にログインして、上記のエラーが消えた事を確認してインストールを完了しました。

コメント